STAGE 3: Connect Radxa Zero 2 Pro to IPad (1 cable for power and ethernet), boot from EMMC, official Linux image
Turn your Ipad into a portable fully featured Linux device !
9/21/202410 min read
So maybe like us you always wanted to use your Ipad for much more - like everything you do on your Linux desktop or laptop ?
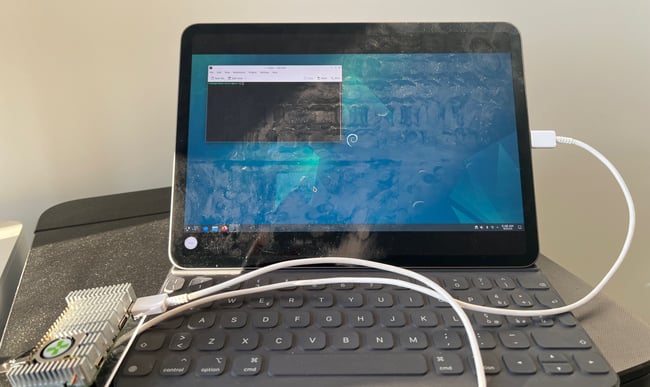
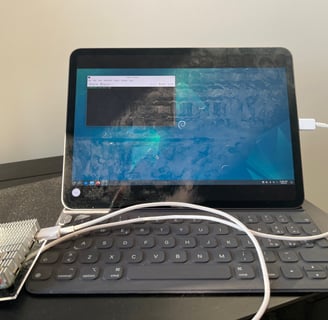
We figured out how to do this using the Radxa Zero 2 Pro connect by a single USB-C cable to the Ipad which provides power and fast ethernet access - super portable, super fast and with VNC you can turn your Ipad into a Linux device.
Here's how ...
Follow the sets in How to set-up Zero 2 Pro (3/4): Boot from EMMC, official Linux image and make sure you have all you need (you will need initially a keyboard, mouse, screen and HDMI connectors).
Once you complete the set up you should be looking at the log in screen for the official Linux image on a dedicated screen with keyboard and mouse attached with the OS installed on the EMMC.
What we are going to do is 1) Set up communication to the internet 2) Configure the USB OTG port to support ethernet (and power) 3) Make it persistent after boot 4) Add persistent VNC sever so that at the end of this if you want to go sit and run Linux on your Ipad or Mac by the side of the river you need only take your Radxa Zero 2 Pro and a USB-C to USB-C power/data cable. Note this is pretty experimental and has only been tried on an IPad Pro. Can be that it will work with any Ipad with a USB-C connector.
1) Set up Wifi
Log on to the Radxa with the default (user name radxa password radxa) unless you changed it.
We need to set up Wifi as some packages are missing at boot to do this.
Click on the wifi icon (bottom right) and select your familiar wireless network and type in the password.
Up will pop the KDE Wallet Service to ask you to set up a password wallet. We were initially not so keen on this as it seems obtrusive, but after some time spent with it we found it to work well. So create a wallet (you need to provide a password which you will need to enter every time you reach the desktop) and select which type of service - we chose "classic" and it seems stable enough.
2) Update the system
OK a word of caution here. In the official Radxa documentation (buried) is a warning ... "Do not use the apt-get upgrade command to update the system, as this will result in an incomplete update, which may lead to abnormal or missing functionality, or even a failure to boot the system."
This is pretty weird and typical of radxa to bury it so you never find it - great job guys.
So we need to do an update.
To do this use "rsetup".
Click the icon bottom far left to bring up the menu of apps (we will call this Apps Button from now on). Select Settings and in there click on rsetup.
Rsetup will fire-up in a window with a text based menu system (space = select, enter to activate an OK or Cancel and esc to navigate back up through the menu system and ultimately out of the application).
A note here, when you open it first time, good old Polkit (Policy Kit) will ask you to authorise use of rsetup and you need the root password to authorise it (radxa if you didn't change it).
Ok once you are in rsetup be careful as you easily brick your device.
You need to select system maintenance and in that menu select system update.
Once executed this will start the standard Linux system update (you know the drill; click Y etc - at some point during the update process you are shown some guidance document which you press return to get through etc). So no going and getting a coffee, you need to sit and watch it as it will just stop and wait for you to press keys at certain moments.
It takes about 5 mins.
Once down - reboot and re-log in. Once logged in you will need to activate the Wallet again with the password you selected - kind of annoying but this will go away soon (read on !).
3) Time to change the nature of the OTG USB socket (port) to make it discoverable by something connected to it and also make it behave addiitonaly as an ethernet port
This is why we need the official image as we were unable to achieve this step with Armbian. That said, a comparison of system resource revealed that Armbian was using 630Mb vs 690Mb of RAM for the official image (with VNC running) .. so very little in it give you have 4Gb of RAM.
OK
Back to rsetup and look for "overlays" -> "manage overlays"
This will bring up a long list - scroll down towards the bottom and you will find "Set OTG port to Peripheral mode". You need to put an asterisk in the box next to this (press spacebar).
Then press tab key to get the the OK button and press Return to OK it.
Esc Esc Esc out of rsetup
Reboot and relogin
Now to enhance the nature of the USB-C port behaviour .. by the way the port we are talking about here is the one you connect power to (the corner one).
Also note that at this point you are fine to have the Radxa Zero 2 Pro powered by a usb-c cable from a USB-C port on a Mac or your Ipad - no need to power it from an adapter in the wall.
OK once you relogged in you go back to rsetup
This time navigate to "Hardware" -> USB OTG Services and in their select either ECM or NCM (faster). We chose NCM (radxa-ncm@ )which is a faster ethernet service than ECM but ECM may suit older devices.
Put an asterisk in the box with the spacebar and OK it then quit out of rsetup again.
4) Connect up the ethernet link
Unless the radxa Zero 2 Pro isn't already you now need to power it from a USB-C socket on your Mac or Ipad. So you may need to shutdown and connect the Mac /Ipad to the Radxa Zero 2 Pro OTG USB-C port (with a cable capable of power and data) (the port is the one by the corner of the device).
Once you are powered on and back in the Linux desktop you need to add ethernet connection.
NOTE that you still need to keep the keyboard, mouse and screen connected on the hdmi port and other usb socket.
Click the Apps Button (bottom left) and open system settings -> connections and press the "+" sign to add a connection. Select wired ethernet - then in the general config tab make sure that All users may connect is selected - open the Ipv4 tab and select Manual method not automatic as we are going to give the ethernet connection a local IP. Generally pick something along the lines of 162.105.x.x (just an example ehre we will use 162.105.245.55).
Now click in the IP address box and add your chosen IP address for that port connection 162.105.245.55 in this example.
Next to it add a subnet mask 255.255.0.0 for instance
Leave the Gateway blank for now
Now Click Apply at the bottom (it's easy to miss this and spend ages wonder why it's not working to find you never applied these changes) and save the changes.
Now here we think there is an issue with the device as to get this port to incorporate ethernet behaviour persistently is a bit tricky.
First open a terminal and type sudo nmtui
You will need the root password
This will open the nmtui application where you can activate your ethernet connection.
Just find you ethernet connection in the list - and Activate it
Esc out of the application one it is done.
If yuo did it all correctly on the Mac open System Settings, Network, look for an Ethernet Gadget or OTG Utils network already setup or set one up by clicking the dots at the bottom and select add a service like OTG Utils or Ethernet Gadget. You will need to configure the network ... click on it and click details -> TCP/IP -> Configure IPv4 Manually, add an IP address which must follow 162.105.245.x where you can pick say 3 for x and set the Subnet mask to 255.255.0.0 .. ignore IPv6 for now and click OK.
On Ipad open settings and underneath Wifi you should see that Ethernet has magically appeared - click on that and you should see OTG Utils - again you need to set a static IP so Configure IP put as Manual, add an IP address (can be the same as the MAC) and add the 255.255.0.0 subnetmask
You should see your connection as live !
At this point you are connected ... BUT only temporarily
By all means do a test - from the Mac open a terminal and try ping 162.105.245.55 and on the Radxa Zero 2 Pro open a terminal and ping 162.105.245.3 for the Mac
Ipad ... we found iSH a brilliant app as it's a very very basic Linux shell which can support ssh and ping - so download that and open it. In the localhost yuo have a sort of Linus running and try pinging your Radxa Zero 2 Pro :)
Should all work .. but in a moment it will not !
Note that at this point we were using around 616Mb Ram which was around the same as our Armbian installation.
Back to the Radxa Zero 2 Pro ...
Before you do anything else ... open up settings -> system settings -> select your wifi network from connections and open the general configuration tab - MAKE SURE the wifi connection is available for all users box is checked because when we reboot the ethernet connection is going to vanish !
Also make a note of the IP address of the wifi connection (will be something like 192.168.x.x) as you are going to need it !
Once done shutdown the Radxa Zero 2 Pro and remove the keyboard, mouse and screen - we don't need them anymore.
The only thing you need is a usb-c to usb-c cable !
5) Hey ! Who stole my ethernet connection ?
Go ahead and power up the Radxa Zero 2 Pro and wait 20 seconds whilst it boots. One cable from the Mac or Ipad to the Radxa Zero 2 Pro into the OTG USB-socket.
Open a terminal on the Mac or open iSH on the Ipad.
ssh radxa@XXXXXXXXXXXX
XXXXXXXXXXXX = the IP address of the Wifi on the Radxa Zero 2 Pro
You will asked (if you didn't do this before) to create a fingerprint (y) and after that to log into the Radxa Zero 2 Pro using the normal login for your radxa user ID.
If you used this IP before you may need to flush the old fingerprint so you will need to type ssh-keygen -R XXXXXXXXXXXX or manually remove the old finger print (instructions are in the message you receive).
What you will notice is that the Radxa Zero 2 Pro ethernet connection is not visiable on the MAC or Ipad !!!!!
So back in the terminal session on the Radxa Zero 2 Pro we need to activate the ethernet connection via USB again and make it persistent.
Type nmcli connection show
You will see the ethernet port and a UUID for it (a long string of letters and numbers 283954a-3324f-353-etc etc etc
Copy this UUID for the ethernet port
Now we will do a quick script for systemd so that we can activate the usb0 port with ethernet capcbility every boot up.
sudo nano /etc/systemd/system/network-connection.service
Add the following in to the script and save the changes[Unit]
Description=Manage Ethernet Network Connection
After=network-online.target
Wants=network-online.target
[Service]
Type=oneshot
ExecStart=/usr/bin/nmcli connection up HERE PUT THE UUID
RemainAfterExit=yes
[Install]
WantedBy=multi-user.target
Now we set this to run on boot-up
sudo systemctl daemon-reload
sudo systemctl enable network-connection.service
Make sure that we remove the default wait time on the systemd-networkd-wait-online.service module which is 2 minutes (!) else it will take ages for the device to set up the ethernet connection which is immediate and local.
sudo systemctl disable systemd-networkd-wait-online.service
Now add a route for the connection ..
sudo nmcli connection modify HERE PUT THE UUID ipv4.routes "162.105.0.0/16 162.105.245.3"
The last part is the IP address of the Mac or IPad you selected earlier.
Now name associate the changes to the usb0 port ...
sudo nmcli connection modify HERE PUT THE UUID connection.interface-name usb0 connection.autoconnect yes
Done
Reboot and within a few seconds of rebooting you will see the network connection go live on the Ipad or Mac.
You now have a persistent 1 cable connected ethernet and power connection between your Radxa Zero 2 Pro and Mac or Ipad.
You should be able to ssh directly using the ethernet connection to the Radxa Zero 2 Pro ... ssh radxa@IP ADDRESS OF THE ETHERNET CONNECTION YOU PICKED FOR THE RADXA.
3) Bonus - VNC headless set up
We like using CLI but why not run a desktop environment ? expcially with the nice screen on the Ipad ?
Install a VNC viewer on your Mac or Ipad (RealVNC is pretty good) and easy to install but pretty much any one will do.
First we need to install VNCServer on the Radxa Zero 2 Pro
ssh in on your new shiny ethernet connection.
sudo apt-get install dbus-x11
sudo apt-get install tigervnc-standalone-server tigervnc-xorg-extension tigervnc-tools
vncserver
The final command will ask you to set up a VNC password
It will also ask you for a view only password (we set n)
It also spawns a VNC session which we need to kill
vncserver -list
Look for the display # and kill it ...
vncserver -kill :THE DISPLAY NUMBER (normally 1)
Now we do a short script to tell VNCServer what environment to serve.
nano /home/radxa/.vnc/xstartup
#!/bin/sh
unset SESSION_MANAGER
unset DBUS_SESSION_BUS_ADDRESS
unset XDG_RUNTIME_DIR
/etc/X11/xinit/xinitrc
[ -x /etc/vnc/xstartup ] && exec /etc/vnc/xstartup
[ -r $HOME/.Xresources ] && xrdb $HOME/.Xresources
xsetroot -solid grey
#vncconfig -iconic &
startkde &
Save this and make it executable ...
chmod +x ~/.vnc/xstartup
Now you can manually start the VNCServer with something like ..
vncserver :1 -geometry 1920x1080 -depth 24 -localhost no
Open up the VNCViewer on the Mac or Ipad and add a connection to RADXA ZERO 2 PRO IP ADDRESS YOU PICKED FOR ETHERNET:1
You will asked for the VNC password you set, input that and up on the Ipad screen will come the Radxa KDE desktop you are familiar with.
Sometimes the colours are corrupted and moving some windows around or just opening the display configuration on KDE and it will suddenly fix itself.
You can hapily run like this start the VNCServer only when you need it.
If you want it to be persistent you simply add another systemd module which starts the VNCServe every time you boot up (obviously this uses a bit more system resources c. +100mb RAM and +2% CPU usage seemed to be the price to pay to run it all the time in the background. If you plan to use the Raxda Zero 2 Pro always headless, makes sense to automaticaly start the VNCServer on boot up.
To do this ...
sudo nano /etc/systemd/system/tigervnc.service
[Unit]
Description=Start TigerVNC Server for radxa
After=display-manager.service
[Service]
Type=forking
User=radxa
PAMName=login
WorkingDirectory=/home/radxa
ExecStart=/usr/bin/vncserver :1 -geometry 1920x1080 -depth 24 -localhost no
PIDFile=/home/radxa/.vnc/%H:1.pid
Restart=on-failure
RestartSec=10
[Install]
WantedBy=multi-user.target
Save the changes
Now add it to the boot sequence ..
sudo systemctl daemon-reload
sudo systemctl enable tigervnc.service
Reboot
Congratulations - you can now hack the hell out of Linux on the road with a truly fast device :)
In the next article we will look at:
Clearing up annoying Polkit when you VNC in.
Setting up a set of graphic framework so you can develop some cool OPENGL ES code using GLFW as a framework.
Support
Connect
contact@bestsbcnow.com
All information on this site is provided as is. Use at your own risk.
© 2024. All rights reserved.